Painting your walls can transform any space, but achieving a flawless, professional-looking finish often feels out of reach for many homeowners. Traditional brushes and cheap rollers can leave behind streaks, uneven textures, and visible marks that detract from the overall look. For those searching for a way to enhance their DIY projects, a Foam Roller For Painting is an excellent tool that can help you achieve smooth walls faster and more efficiently. Whether you’re tackling a single room or an entire house, using the right techniques and tools can make all the difference.
Why Choose a Foam Roller for Painting?
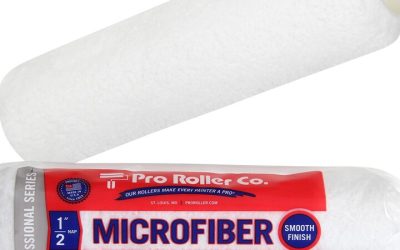
Foam rollers have become increasingly popular among both professionals and DIY enthusiasts due to their ability to deliver an ultra-smooth finish with minimal effort. Unlike traditional nap rollers, foam rollers don’t shed fibers or create stippling, which means you get a cleaner, sleeker result. Their unique design allows for even paint distribution and easy maneuverability, especially on flat surfaces like walls and ceilings.
Key Benefits of Foam Rollers
- Smooth Application: Foam rollers are ideal for applying latex or oil-based paints smoothly, reducing the likelihood of roller marks and brush strokes.
- Faster Coverage: Their absorbent material holds more paint, allowing you to cover larger areas in less time.
- Easy Cleanup: Most foam rollers are disposable or simple to clean, making post-project cleanup a breeze.
- Cost-Effective: With fewer materials wasted on touch-ups, foam rollers save both time and money.
Pro Tips for Achieving Smooth Walls
To get the most out of your foam roller and ensure professional results, consider the following tips:
1. Prep the Surface: Start by cleaning and lightly sanding the walls. Fill any holes or cracks with spackle and allow it to dry before sanding smooth.
2. Use Quality Paint: Invest in high-quality paint for better coverage and durability. Cheap paints often require more coats and can lead to patchy results.
3. Load the Roller Evenly: Dip the foam roller into the paint tray and roll it back and forth to evenly saturate the roller without overloading it.
4. Work in Sections: Paint in small, manageable sections using a “W” or “M” motion to distribute the paint evenly before filling in the gaps.
5. Maintain a Wet Edge: To avoid lap marks, always maintain a wet edge by overlapping slightly with the previous section before the paint dries.
6. Apply Multiple Thin Coats: Two thin coats are often better than one thick coat. Allow each coat to dry fully before applying the next.
When to Use a Foam Roller
Foam rollers are best suited for:
- Smooth, flat surfaces such as interior walls, ceilings, and doors.
- Applying enamel or semi-gloss finishes where a glass-like result is desired.
- Projects where time and cleanliness are priorities, such as touch-ups or accent walls.
However, they may not be ideal for textured surfaces, as the foam cannot reach into deep crevices.
Transform Your Painting Experience
With the right preparation and technique, using a foam roller can dramatically improve the outcome of your painting projects. Not only will you achieve smoother walls in less time, but you’ll also enjoy a more satisfying and efficient DIY experience. Remember, the key to a professional finish lies in both the tools you choose and the care you take in each step of the process. By incorporating a foam roller for your next painting project, you can enjoy sleek, beautiful walls that enhance your home’s appeal and value.